PaySchools Central Parent Accounts
In this article, we will cover creating your parent management account in PaySchools Central. To create this account, you will need to visit this link:
Create an account in PaySchools Central:
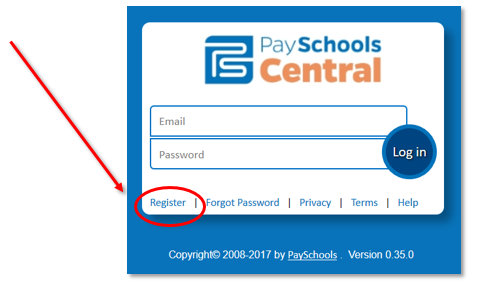
- Open the "Pay Schools Central" application
- Click on "New User Registration" link
Enter information in the Required Fields. *
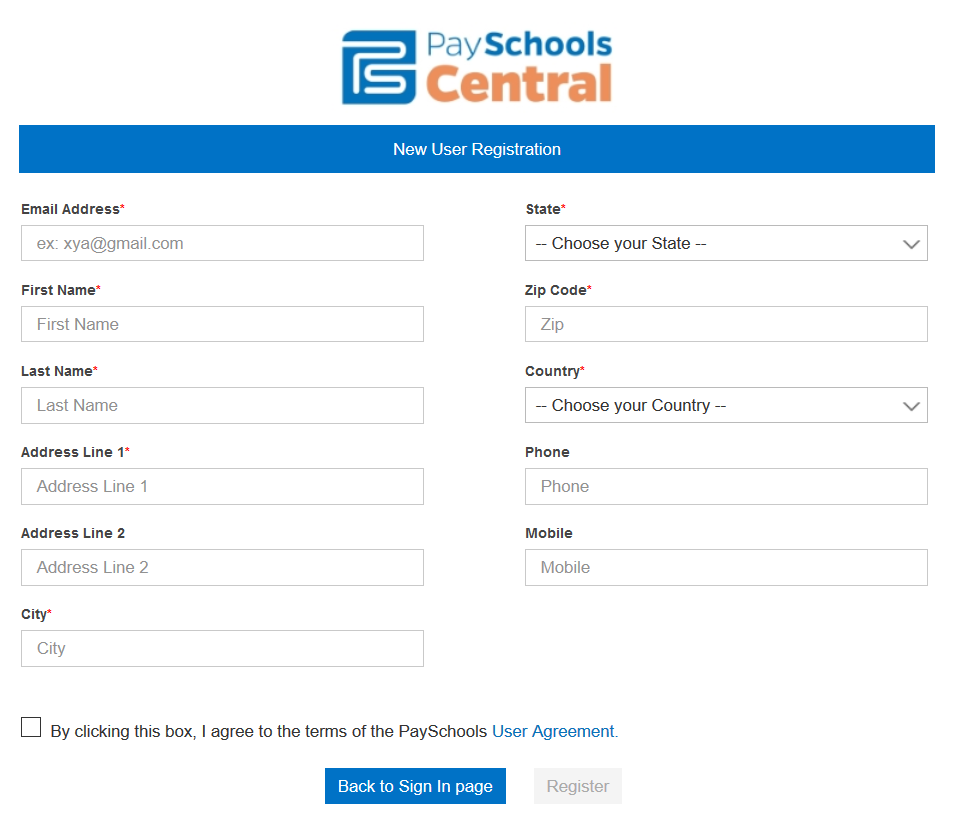
-
Click on the Registration button
- Providing the correct information will confirm success and you will get a verification email to complete registration at the email address you have provided.
- Check your email and follow the link to setup a password for your account.
If you do not provide correct information you will receive the following possible errors:
Invalid Email address Form "We are sorry but your email address does not appear to be correct."
First/Last name blank "Please enter your First and Last Name."
Email address already exists in the database. "You have already registered with this email address, Please log in with your email and password. If you have forgotten your password, please use the Forgot my password link."
Next we will cover adding your students to your account so that you can add money to their lunch account, pay student fees, view their meal history, etc.
To start adding your children to your management account you will need their Student ID, you can find this in their OneView Student profile or in their ProgressBook Student profile.
Return to the Parent Portal: https://www.payschoolscentral.com/#/user/login
Add Student/Patron:
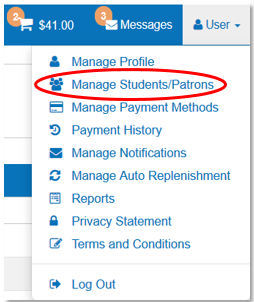
- Click Manage Student/Patrons
- Click on Add Student / Patron
- Enter the Required Information

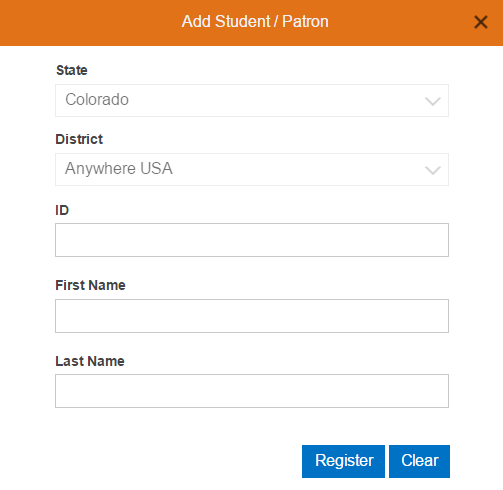
Click Register
- Student will be validated and added to your account. You can ontinue with another student, or close the Add Student / Patron Box.
- Click the back button to return to the dashboard.
If you have multiple students in your household you can repeat these steps for each of your children.
Next, you will want to add a payment method if you plan to add funds to your child's lunch account and pay school fees online.
Now that you have completed these steps you are ready to download the PaySchools App for your iPhone or Android device!
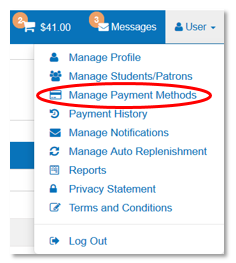
Manage Payment Methods:
Next, we will cover adding funds to you child's lunch account.
Make a Meal Payment:
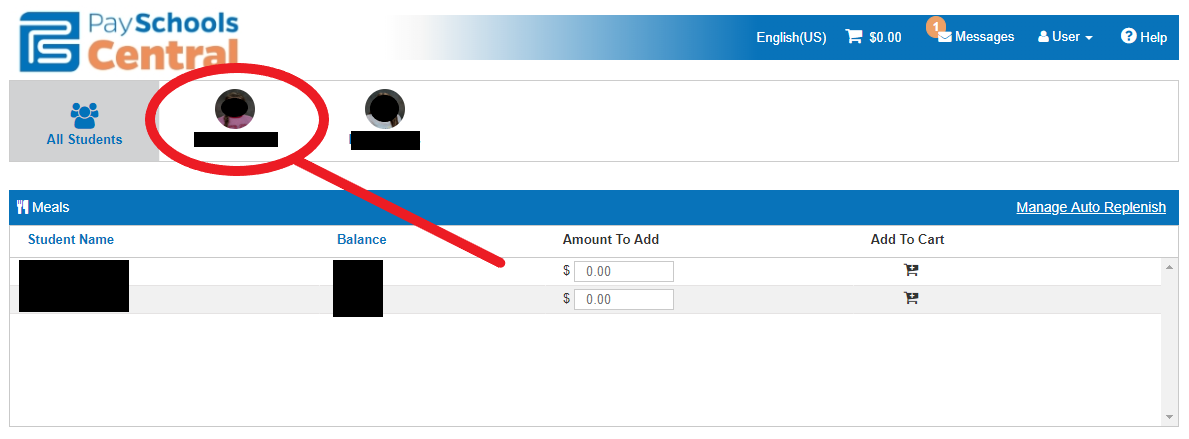
On the Meal Grid, enter an amount to add next to the student you wish to make the payment for. Click Add to Cart. A confirmation window will appear to confirm your payment choice.
Click Add to Cart. The shopping cart icon at the top of the page will change to reflect the items you add to the cart.
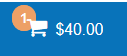
When you are ready, you can click
on the shopping cart button and check out.
You can access the manage Payment Methods screen from the User icon on the top right of the page. Click Manage Payment Methods. The screen will display any payment methods you currently have on file. You can edit or remove a payment method on file by using the links provided by that payment method.
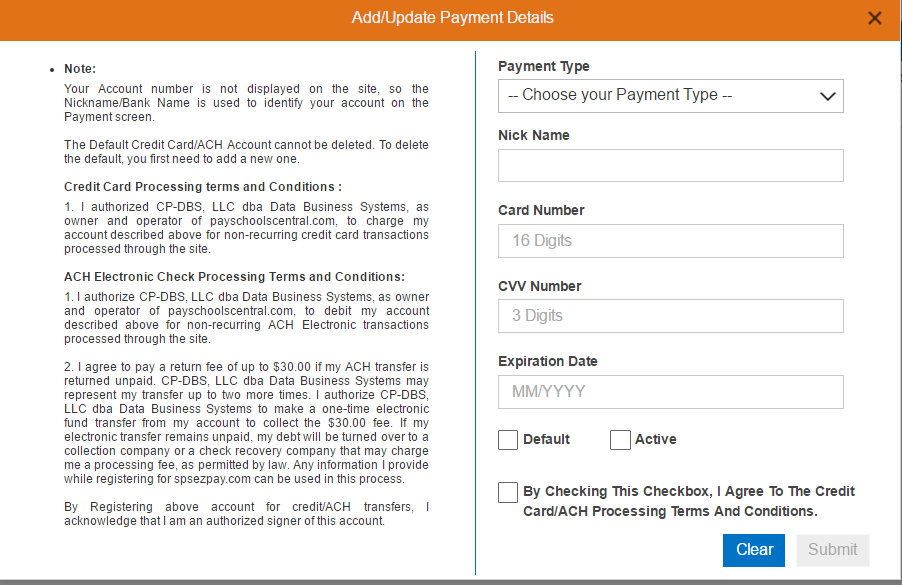
Use the Add New Payment link to add a new Payment method.

Choose the payment type you would like to add. Make up a nickname for your payment type that only you would know. Enter the information that is requested in the additional fields and click submit.
Next we will cover how to pay school fees online.
If the building that your child is attending has school fees available to be paid online you will be able to follow these steps.
Make
a Fee Payment:
The Fees grid displays by default, the list of assigned fees for your students. To switch between assigned fees and optional fees, click the Assigned/Optional tab at the top of the grid.
Items that must be paid in full will display in gray. Items that allow partial payments will
display in white to allow you to type in an amount different than the amount
displayed.
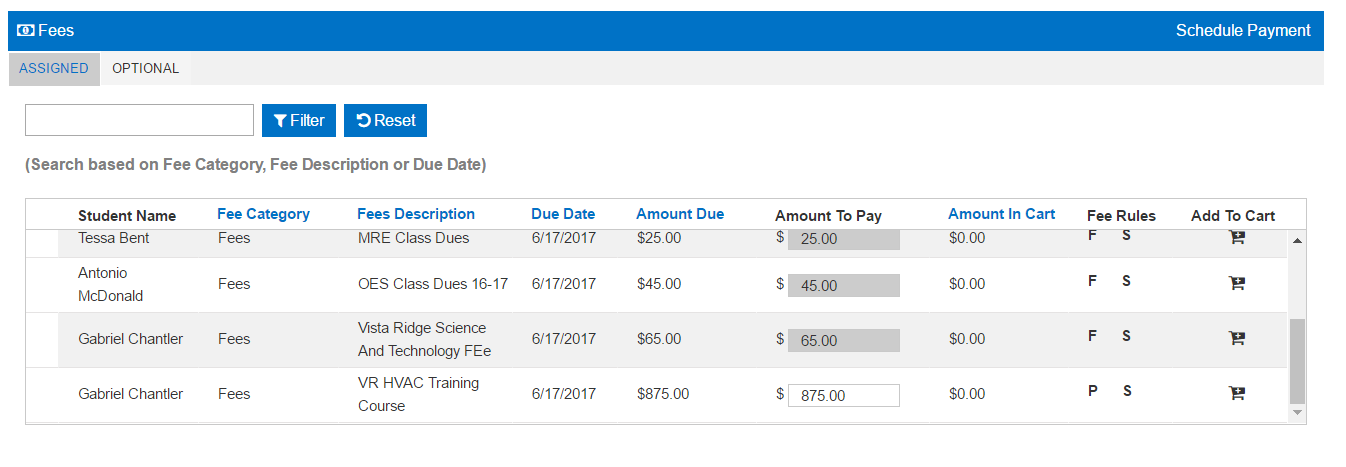
To make a fee payment that requires payment in full:
- Click the Add to Cart link on the line item you
wish to pay.
- Click Add to Cart on the confirmation screen
that is displayed.
- Your shopping cart total will increase by the
amount added, and the count of items in the cart will increase.
To make a fee payment that allows a partial payment:
- Enter the amount you wish to pay on the line item.
- Click the Add to Cart icon.
- Click Add to Cart on the confirmation screen
that is displayed.
- Your shopping cart total will increase by the amount added, and the count of items in the cart will increase.
Next, we will show you how to view and save a report of all of your child's purchases.
Student
Meal Report:
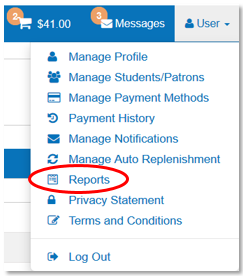
You can access the Patron Meal Activity report on the User
link on the top right of the page. Select
Reports.
- Select the Patron you wish to view.
- Select the From and To Date range you wish to view.
- Click the Generate report Icon.
- A report will be created for you and downloaded to your desktop.
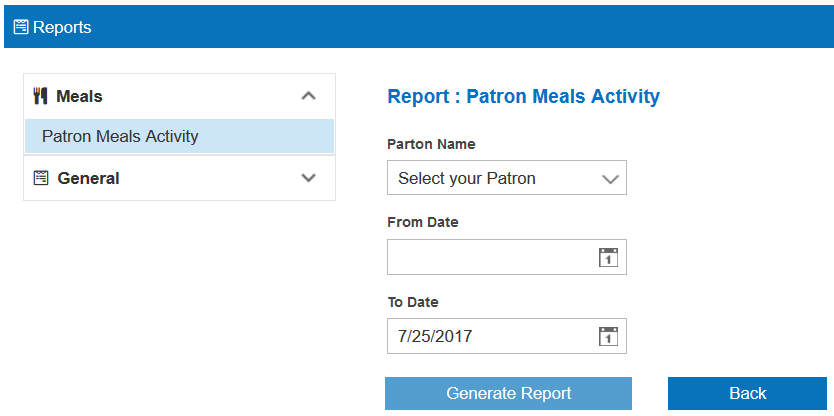
If you would like to have more of an "At a glance" view of what your child has purchased in the cafeteria you can simply click on your childs picture in the dashboard page.
Next, you will select "Want to see what your child is eating?"

This will give you a quick glance at your child's history in our cafeterias.
Next, we will cover Meal Restrictions.
If you would like to set up limitations of what your child can and cannot buy in the cafeteria, you will need to follow these steps.
The back button will return you to the main website page.
Meal
Restrictions:

To setup meal restrictions for a child, first start by clicking the child’s name at the top of the main dashboard page. Then click the Meal Restriction link at the top of the Meals Grid.
Some restrictions require inputting a dollar value to limit spending, setting a flag on or off to restrict purchases, or restricting items or item groups by selecting them and adding them to the restriction list.
To set a value that
requires a limit: Input a dollar
limit amount.
To set a value that
has an on/off flag: Click the
on/off button to set the restriction on or off.
To restrict a group
or item from being purchased: Click
the item on the left side grid and use the arrows to add it to the grids on the
right.
After you are done, use the Save button to save your changes
to the system.
Finally, we will cover managing your notifications and the Notification center.
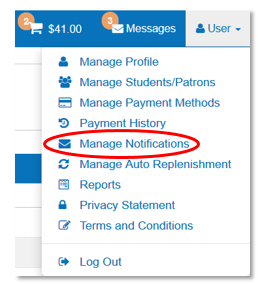
Manage Notifications:
The system has several notifications available for a user to receive. The notifications shown correlate to the features of the system that the district uses.
Access Manage Notifications from the User Icon on the top right of the page and click Manage Notifications
- Turn a notification on by using the On/Off
toggle switches.
- Additionally, set up the notices required for Balance or Day and then click the Add button to add this notice type.
- Click the Update link after changes are
complete.
Checking your notifications in the Notification Center.
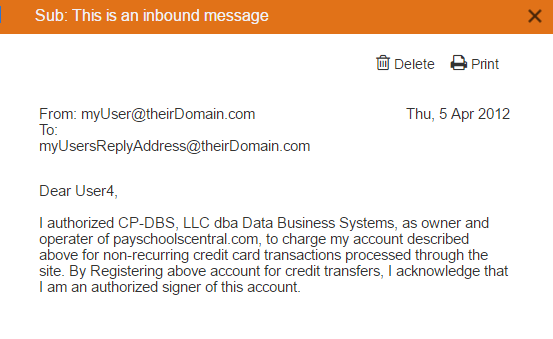
Notification Center:
Our PaySchools Central application will communicate information to you, the user, of our Notification Center. If you have messages waiting to be read, we will notify you at the top of the page with the count of unread items.
Clicking this link will take you to your messages. Messages considered high priority will direct you to this section automatically to make sure you read and acknowledge them.
- To read a message, double click the message. It will open to display additional information.
- You can delete the message, which will move it to the Trash folder.
- You can print the message, or you can use the X to close this message and save it in the current folder.